Writing Rules
After purchasing, you'll notice that there is a new button on your Wardrobe webpage: ![]() . Click it to open the Rulebook window:
. Click it to open the Rulebook window:
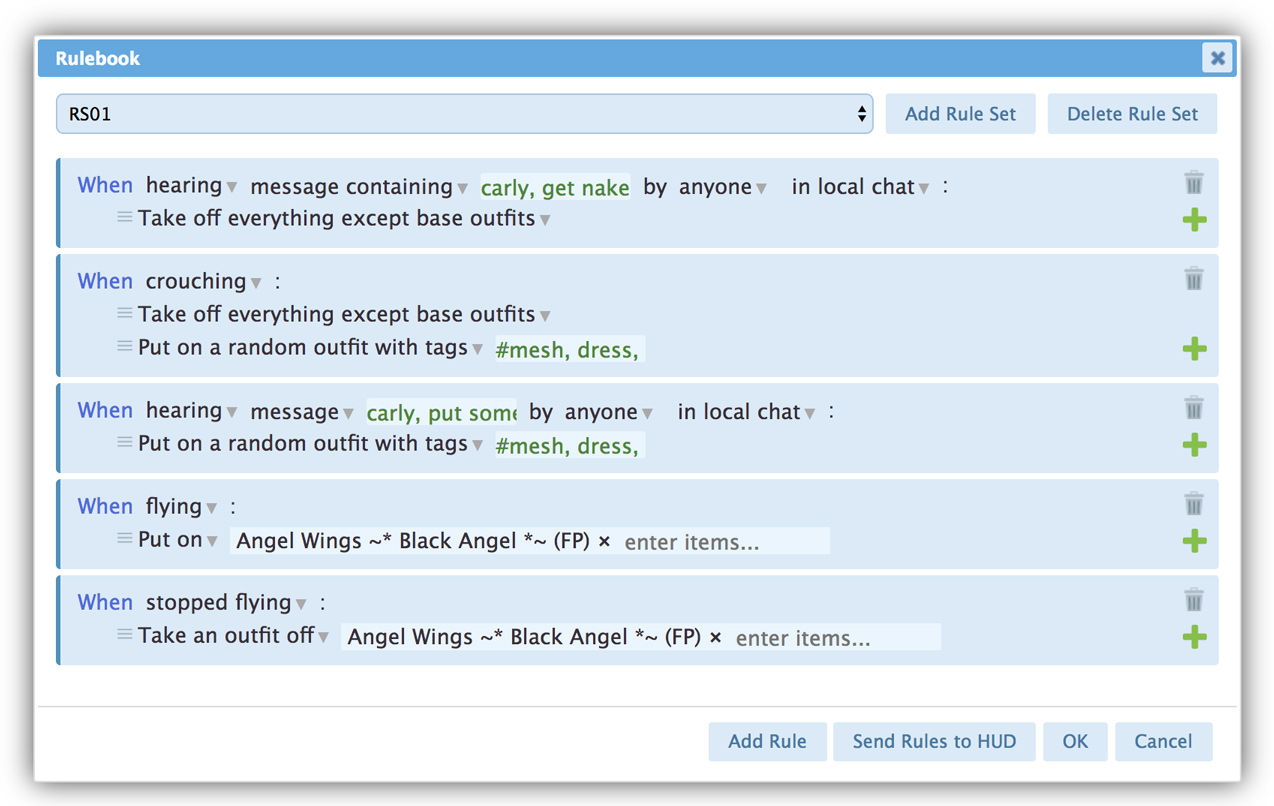
The rules are organized in rule sets. When you first start, you'll see the "Default Rule Set" activated. You can just start with this, or you can create a new rule set by clicking the "Add Rule Set" button and give it a unique name.
Once you have your rule set set up, add a new rule by clicking the "Add Rule" button at the bottom of the window.
You'll see a new rule entry, prompting you to select a condition. The conditions are described in the Conditions and Actions Reference.
The condition is one part of the rule, it defines when the rule is executed (e.g, it will activate when you teleported somewhere, or if someone said something in local chat, etc.). In the line(s) below, you define what will happen if the condition is fulfilled. Again, a description of the actions is in the Conditions and Actions Reference.
By clicking the ![]() icon, you can add more actions to your rule. If a rule has multiple actions, all of them will be executed, from top to bottom.
icon, you can add more actions to your rule. If a rule has multiple actions, all of them will be executed, from top to bottom.
You can reorder the actions by dragging and dropping the handle ![]() to the left of the respective action. Clicking the handle will show a popup menu, with the option to delete the action.
to the left of the respective action. Clicking the handle will show a popup menu, with the option to delete the action.
If you want to delete an entire rule, click the ![]() icon to the right of the rule.
icon to the right of the rule.
Once you're done defining your rules, or if you'd like to test them, click the "Send Rules To HUD" button, and the rules will be transmitted to your Wardrobe HUD.
Note that only one rule set can be active at any given time. If you want to change the active rule set, select the rule set you want to activate from the drop down at the top of the Rulebook window, and then click "Send Rules To HUD."